When it comes to optimizing WordPress performance, every little bit helps. Even a small performance boost can have a big impact on your site. With so many different ways to optimize a WordPress site, it’s difficult to know where to start. Fortunately, there are several simple steps you can take right now to speed up your site and save bandwidth at the same time by learning How To Enable GZIP Compression and increase your SEO metrics by making Google happy about your website speed.
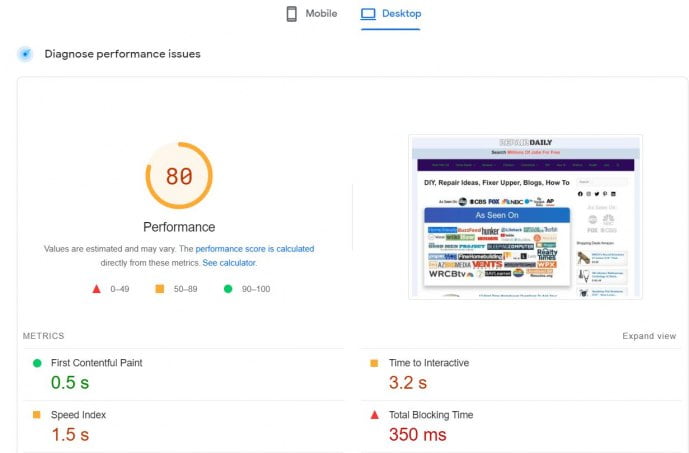
To see how fast your website loads from another city or country, you can use an external service like pingdom , Google page speed , or GTmetrix . You should be aiming for a score of 100 in each test and ideally below 1 second load time from anywhere in the world. If you understand some technical details about how websites work and what factors influence loading times, enabling GZIP compression is just one of the few simple things that you can do today to drastically improve performance. Lets find out How To Enable GZIP Compression.
What is GZIP Compression?
Before we read How to Enable GZIP Compression, lets find out what is GZIP Compression! GZIP compression is a data compression technique that reduces the size of a file by about 70%. It is commonly used with web pages and other network traffic to reduce the time needed to transfer the data. GZIP compression works by identifying repetitions in the data such as duplicated words and identical sequences of characters, and replacing them with references to the earlier occurrence.
What does GZIP compression do?
Web files (particularly HTML, CSS, and JavaScript files) are compressed using Gzip so that they can be much smaller than before. The compressed file is then delivered to the client’s browser in lieu of the large original file. The browser then decompresses the compressed file and delivers the original file uncompressed. Now lets scroll down to understand How to Enable GZIP Compression.
Enable GZIP Compression for WordPress
GZIP compression is enabled by default in WordPress. But most bloggers and website owners don’t know that they can enable it even more. GZIP compression is enabled by default in WordPress. You should have enabled it right after you activated your blog. You may have read it, but maybe you didn’t really pay attention to it.
GZIP compression, when enabled, compresses text-based content like HTML and CSS files. But if you want to compress the data even more and speed up your site, you can increase the level of compression by tweaking the WordPress configuration file. You can do this by manually editing the file or using a WordPress optimization plugin. If you’re comfortable with editing the configuration file, you can go to the WordPress configuration file and change the value of the “gzipped_content” setting. Ideally, it should be set to 9.
In relation to gzip/deflate compression, we’re able to define whether or not the browser can handle the data; it either accepts or rejects the header. Our objective is to configure the server so that it delivers compressed content if it is appropriate, saving bandwidth for everyone (and making us happy). In case a browser requests a gzipped version of a document, we can’t prevent it. Our responsibility is to configure the server to deliver compressed content, saving bandwidth for everyone (and making our customers happy).
For IIS, follow this link to enable compression in the settings.
In Apache, go to this site to enable output compression. Then add the following to your .htaccess file:
# compress text, html, javascript, css, xml:
AddOutputFilterByType DEFLATE text/plain
AddOutputFilterByType DEFLATE text/html
AddOutputFilterByType DEFLATE text/xml
AddOutputFilterByType DEFLATE text/css
AddOutputFilterByType DEFLATE application/xml
AddOutputFilterByType DEFLATE application/xhtml+xml
AddOutputFilterByType DEFLATE application/rss+xml
AddOutputFilterByType DEFLATE application/javascript
AddOutputFilterByType DEFLATE application/x-javascript
# Or, compress certain file types by extension:
<files *.html>
SetOutputFilter DEFLATE
</files>
<IfModule mod_deflate.c>
<IfModule mod_filter.c>
AddOutputFilterByType DEFLATE “application/atom+xml” \
“application/javascript” \
“application/json” \
“application/ld+json” \
“application/manifest+json” \
“application/rdf+xml” \
“application/rss+xml” \
“application/schema+json” \
“application/vnd.geo+json” \
“application/vnd.ms-fontobject” \
“application/x-font-ttf” \
“application/x-javascript” \
“application/x-web-app-manifest+json” \
“application/xhtml+xml” \
“application/xml” \
“font/eot” \
“font/opentype” \
“image/bmp” \
“image/svg+xml” \
“image/vnd.microsoft.icon” \
“image/x-icon” \
“text/cache-manifest” \
“text/css” \
“text/html” \
“text/javascript” \
“text/plain” \
“text/vcard” \
“text/vnd.rim.location.xloc” \
“text/vtt” \
“text/x-component” \
“text/x-cross-domain-policy” \
“text/xml”
</IfModule>
</IfModule>
Apache comes with two types of compression options:
- mod_deflate is easy to set up and also is industry standard.
- mod_gzip seems more powerful as you can pre-compress contents from server.
Deflate is fast and effective, so we prefer mod_gzip, but its really upto you. Now that you know How to Enable GZIP Compression, lets ponder upon some website speed topics related to How to Enable GZIP Compression.
Gzip Compression Check
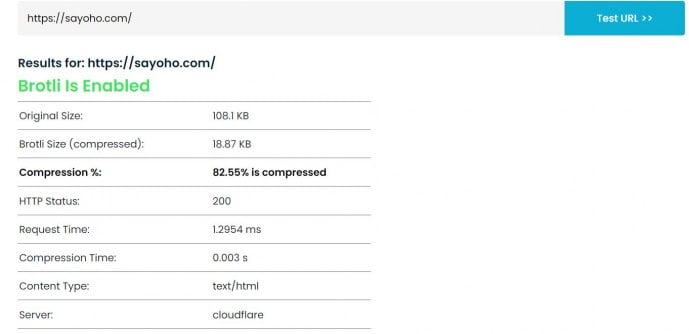
Use sites mentioned below to test your website’s GZIP compression status. If you use Cloudflare free service, most probably you are already GZIP Compressing your server files as you can see image below.
- https://www.giftofspeed.com/gzip-test/
2. GIDZipTest: Web Page Compression (Deflate / Gzip) Test – GIDNetwork

Shifting to HTML and Text Based Loading
A lot of people believe that images are an important part of a website. They help create an aesthetic appeal and draw in the readers. But images also take time to load. If you are not using GZIP compression (which compresses the data), your readers will have to wait a bit longer to see the image on the page.
If you have a lot of images on your posts, it will also increase the overall loading time of the page. That is why you should shift to HTML and text-based loading besides Enabling GZIP Compression.

You will not be able to do this on your posts where you want to insert images and edit the captions. But you can do this on your pages. You can use HTML and text-based loading for your homepage. This way, visitors will see a full page and will not have to wait for the images to load.
GZIP Compression Warning
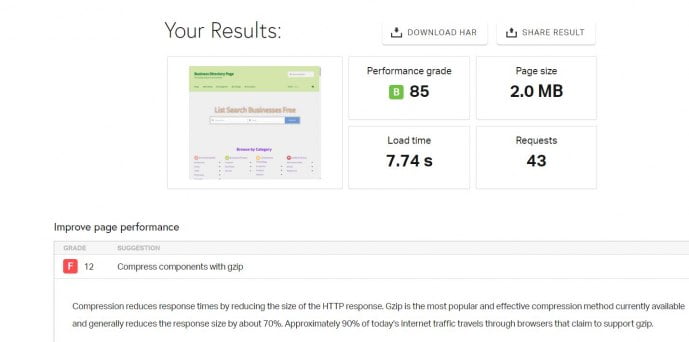
If you use website speed test tools like Google, GTmetrix, Pingdom, they show if your website is compressed or not as seen below. So this GZIP Compression Warning should be taken seriously to fix the issue and speed up your wordpress website by performing above mentioned steps to Enable GZIP Compression to Speed Up WordPress Sites.

To not see this warning learn steps of How to Enable GZIP Compression.
Install WP Smush Pro to Optimize Images
There are few other important steps you can take to speed up your website besides implementing tricks of how to Enable GZIP Compression. You can install and use WP Smush Pro to optimize images before uploading them to your WordPress site. This plugin uses image compression and lossless image resizing algorithms to reduce image file size without sacrificing image quality.

With this plugin, you can optimize images for different ad campaigns, social media, and content. You can even optimize the images that are already uploaded to your WordPress site. This plugin will do all the image optimization tasks such as removing unnecessary metadata, finding the best image format, converting images to the desired format, optimizing images with lossless compression, and more. This plugin also supports bulk image optimization, so you can optimize images in one click.
Enable WordPress CDN
If you are running a large website with millions of visitors, you should consider using a CDN (Content Delivery Network). The CDN will host your website’s static assets like images, CSS, JavaScript, and fonts. This way, your website will load faster for the visitors and will save the bandwidth for your hosting provider.
Your hosting provider will charge you for every byte that your website consumes, whether the visitors like it or not. If your website is large and it consumes a lot of bandwidth, you will have to pay a hefty amount for hosting. You can set up a WordPress CDN using services like Cloudflare, MaxCDN, or AWS CloudFront. Or you can use a premium WordPress CDN plugin like WP Super Cache, W3 Total Cache, or Cloudflare for WordPress.
Switch to Browser-Based Rendering
While most of the optimization techniques are related to server-side performance, switching to browser-based rendering is something that will have a positive impact on client-side performance besides implementing steps on How to Enable GZIP Compression. You might have noticed that your WordPress website loads an HTML skeleton before the content loads. When a visitor lands on your website, the server fetches the HTML and CSS files and then loads the content.
However, you can change this default behavior and load the content first and then display it with a lightbox. In doing so, you are saving the processing time and reducing the loading time by half.
Minification of CSS and JavaScript files
You can minify your CSS and JavaScript files to reduce their file size without affecting the functionality. This way, you will reduce the overall page size and load time. You don’t have to do this manually. There are a lot of WordPress optimization plugins that will do this for you. You can use W3 Total Cache to minify CSS and JavaScript files, cache your static assets, and speed up your website. Alternatively, you can use Autoptimize to minify CSS and JavaScript files and other static assets on your WordPress website.
There are other ways to optimize your WordPress site and improve performance besides GZIP Compression check, but these are some of the easiest and most effective changes you can make. By making these simple changes, you can drastically improve the speed and performance of your WordPress site.

Conclusion
Google is your friend and if you take the time to understand its algorithms, it will reward you by sending more visitors to your website. Google is getting smarter and its search engine keeps getting better at understanding what users are looking for. Websites with fast load times are now ranked favorably in search results. Speed is an important part of SEO today, but also a performance best practice that can bring search engines happy crawling back to your site!
As we all know, there are two main ways to speed up websites: reduce the amount of data visitors need to download and reduce the number of requests visitors have to make in order to see your content. Both techniques involve compression, which requires a fair bit of technical know-how. Luckily for you, we’ve got the tips you need!
A lower-sized version of web documents (mainly HTML, CSS, and JavaScript files) is compressed using Gzip, which frequently reduces them by 70%-80%. Instead of sending the user the larger original file, a smaller compressed file is sent to the browser. The browser then decompresses the compressed file and delivers the uncompressed original version.
Google is changing. This isn’t just another algorithm update; this is the beginning of a new era for search. Google is making their search engine smarter and more personal to give searchers exactly what they need, faster than ever before.
In order to achieve that, Google has been tweaking their algorithms to place more emphasis on website speed as a ranking signal. In other words, how fast your website loads will directly impact how users see your site in the SERPs.
That’s why it’s crucial to optimize your WordPress site and make sure it loads as fast as possible! Read on to learn how you can do just that – by learning How to Enable GZIP Compression and speeding up your website with these easy tricks!


